REVIEW · AMSTERDAM
See Shoot Share | Photo Tour
Book on Viator →Operated by PDY Media · Bookable on Viator
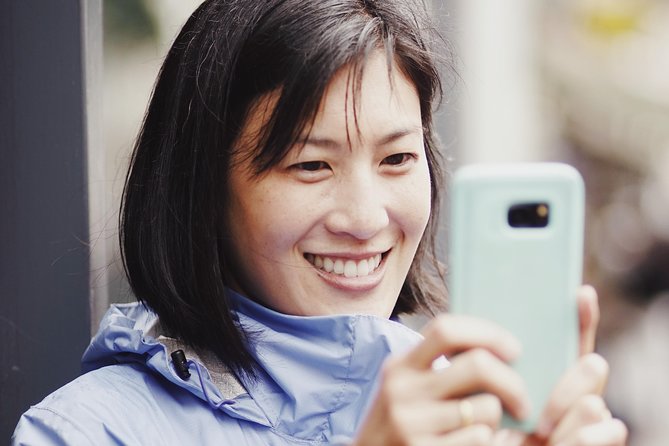
Your phone can shoot like a pro.
This private Amsterdam photo walk through Nine Straatjes, the canal ring, and the Jordaan is built for real-life picture taking, with a guide who helps you fix framing and lighting on the spot. I especially like that you get a professional portrait made in a location you choose, and you learn practical photo skills you can use instantly. The trade-off is it’s a focused shooting session, so wear comfy shoes and don’t expect a long sit-down break since no food or drinks are included.
The vibe is “walk, shoot, adjust, repeat,” not a dry slideshow. One standout in the experience is how guides like Phil explain phone photography tricks in a way that’s easy to try right away. The whole thing runs about 1 hour 30 minutes to 2 hours and stays central, so you can fit it into a packed Amsterdam day.
You’ll meet at Dam 13 (near public transportation) and end back at the same point. It’s offered in English, and you get a mobile ticket, so you can keep things simple on your arrival day.
In This Review
- Key highlights worth planning around
- Why this Amsterdam photo tour is so good for phone users
- Where you meet at Dam 13 and how the shoot gets rolling
- Stop 1: Negen Straatjes (Nine Little Streets) for “small street” photo skills
- Stop 2: Amsterdam Canal Ring shots using light, symmetry, and phone composition
- Stop 3: The Jordaan for moodier street photos that feel local
- The included portrait session: Quick Shot vs Take Two vs Slo Mo
- What you’ll actually do during the 1.5 to 2 hour loop
- Price and value: $66.09 for portraits plus coached shooting
- What to bring and how to get the best results
- Who this Amsterdam photo tour suits best
- Should you book? My decision guide
- FAQ
- How long is the See Shoot Share photo tour in Amsterdam?
- How much does the tour cost?
- Where do I meet, and where does it end?
- Is this a private tour?
- What language is the tour offered in?
- What’s included in the photo session?
- Do I need to pay admission at the stops?
- Is food or drink included?
- Can I cancel for a full refund?
Key highlights worth planning around
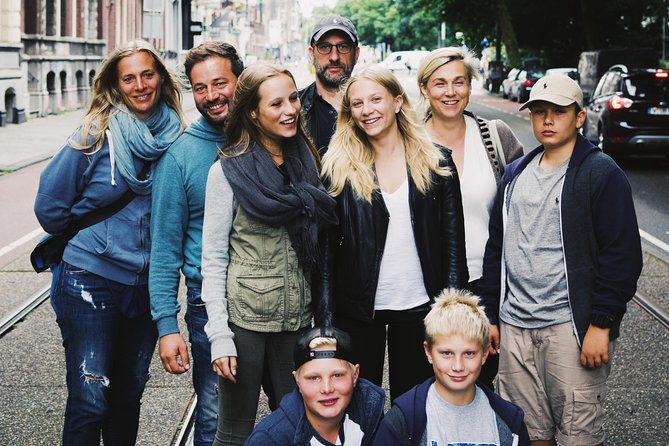
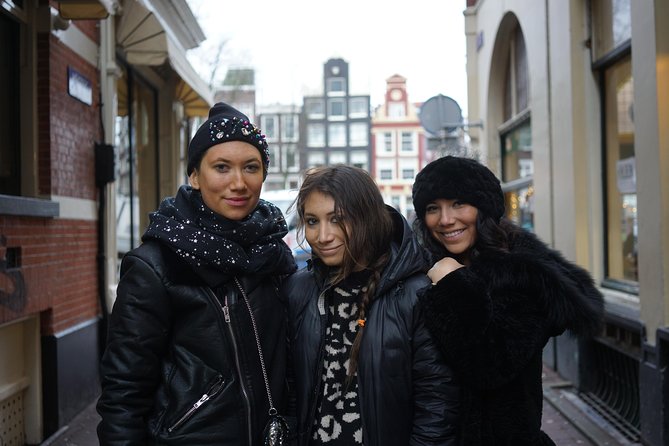
- Private, tailored route: only your group, and you can tell your guide where you want your portrait to happen
- Phone-first photo coaching: you’ll learn how to use light, composition, symmetry, and lines, not just point and tap
- Three iconic areas in one loop: Nine Straatjes, the canal ring, and the Jordaan district
- Included portraits: Quick Shot, Take Two (3 portraits), or Slo Mo (5 portraits), depending on the package
- No entry fees at stops: each stop is marked free for admission, so your money goes to the guide and photos, not tickets
- Short walking time, big return: about 1.5 to 2 hours means you’re not eating up your whole day
Why this Amsterdam photo tour is so good for phone users
If your Amsterdam photos look fine in real life but weird on screen, this tour is built for that exact frustration. The main goal is not just to show you where to stand. It’s to teach you how to make your images match what your eye sees.
You’ll get coaching on everyday stuff that matters fast: how light changes your look, how to shape a composition, and how to use lines and symmetry instead of letting the scene blur into a random snapshot. That kind of guidance is especially useful in Amsterdam, where the streets and canals love perfect reflections and strong geometry.
And because it’s a private experience, you can ask for adjustments without feeling rushed or stuck behind a group. It’s a “do it your way” tour, which is rare in photo walks.
You can also read our reviews of more photography tours in Amsterdam


Where you meet at Dam 13 and how the shoot gets rolling

Most people start their Amsterdam day at Dam Square anyway, so meeting at Dam 13 keeps you from wasting time. You’ll begin and end back at the same meeting point, which is handy if you’re juggling plans after.
The pacing is built around three stops, with about 30 minutes per area. That’s long enough to learn a technique and then test it yourself. It’s also short enough that you’re not stuck wandering through one place until you lose the light.
Bring comfortable shoes. The itinerary moves through compact, walkable neighborhoods, and good photos usually require you to shift position a few times. If your feet feel miserable, it’s hard to focus on angles and framing.
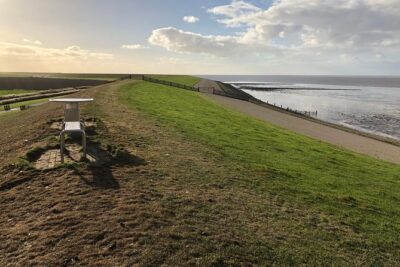
Stop 1: Negen Straatjes (Nine Little Streets) for “small street” photo skills
This is the part where you get to slow down and look up. Nine Straatjes is famous for its charm, and for photographers it’s also a playground of textures and details: narrow lanes, storefronts, and that classic canal-town feel.
What makes this stop valuable is how it sets you up for better images right away. You’re not thrown into a complex task with the canals first. You start with a neighborhood where you can practice fundamentals like:
- framing a subject without cutting off important parts
- using street lines to guide your eye
- paying attention to brightness changes between shaded and sunlit spots
Because the time is limited, you’ll likely get guidance on choosing one or two photo directions rather than trying to capture everything. That’s a real skill. In Amsterdam, more shots often means more confusion. This tour pushes you toward deliberate choices.
Another nice point: you aren’t paying for entry at this stop. You can spend your energy on the pictures instead of budgeting for tickets.
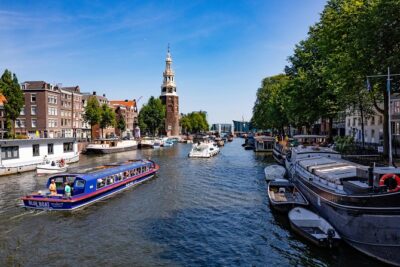
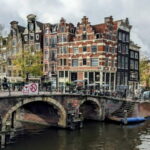
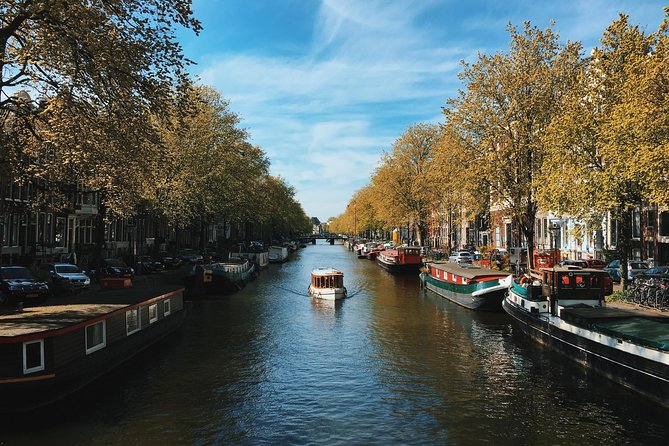
Stop 2: Amsterdam Canal Ring shots using light, symmetry, and phone composition
Now you get to the Amsterdam everyone comes for, the canal ring. Yes, you’ve seen canals before. The difference here is you learn how to photograph them properly instead of just aiming your phone at water.
Canal photos are tricky because the scene includes competing elements: buildings, bridges, boats, reflections, and sky. If you don’t manage composition, you end up with an image that looks messy or flat.
This stop focuses on the stuff that turns a decent shot into a strong one:
- Light: when reflections pop and when they go dull
- Composition: where you place the canal so it leads the viewer
- Symmetry and lines: how to frame bridges and edges for balance
- Using your phone intentionally: not just point-and-shoot
You’ll have time to practice based on what you see in front of you. That’s important. Canal lighting changes quickly, and your best shot often depends on where you stand and how you tilt your framing.
One practical note: if you’re prone to shaky hands, bring a steady stance. You’ll usually be happier with a clean, sharp frame than with a frantic burst of blurry attempts.
Stop 3: The Jordaan for moodier street photos that feel local
The Jordaan is where Amsterdam starts to feel less like a postcard and more like real daily life. It’s quieter in tone than the most tourist-heavy zones, and that matters for your photos.
Instead of only chasing famous views, you learn how to capture mood: street corners, passing rhythm, and small moments. This stop is ideal if you want your portfolio to include more than just canals and architecture.
What you’re working on here is photographic storytelling, even in a short 30-minute window. You’ll likely get prompts about:
- picking a subject that gives the scene meaning
- using the street layout to create depth
- choosing angles that make the place feel lived-in
The Jordaan also gives you variety. After practicing canal symmetry, switching to street mood keeps your eyes fresh. It’s a smart pacing choice for a short tour.
And again, there’s no admission ticket required for this stop, so you can keep your plan simple.


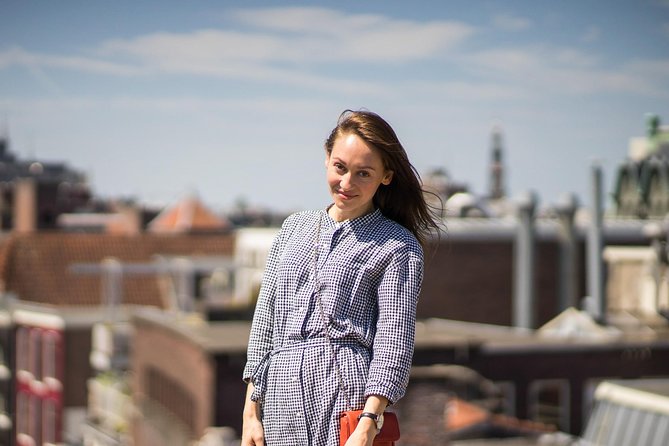
The included portrait session: Quick Shot vs Take Two vs Slo Mo

This tour stands out because it doesn’t end when you put your phone away. You get a professional portrait created as part of the experience.
The number of portraits depends on the package included with your booking:
- Quick Shot Tour: an exclusive portrait
- Take Two Tour: 3 portraits
- Slo Mo Tour: 5 portraits
Here’s why that matters for value. Many walking photo tours teach you techniques, but they don’t give you polished results of you as part of the trip. Having a professional portrait means you leave with images that don’t look like you were hiding behind a crowd.
You can also tell your guide where you want the portrait location to happen. That’s a big deal in Amsterdam, where the difference between a good and great photo is often just a few steps to the left or right.
If you’re going solo, this is especially helpful. If you’re traveling with someone who loves snapping pics but isn’t chasing angles and light, it gives you a reliable way to get a great shot of both you and the city.
What you’ll actually do during the 1.5 to 2 hour loop
This is a guided photo tour, but it’s not passive. You’re actively shooting during each part of the walk, then adjusting based on prompts from your guide.
A good way to think about it: you get instruction in small chunks, test it immediately, and repeat. That’s exactly how you learn photography in real life. It’s also why the timing works. In only 1.5 to 2 hours, you can still meaningfully improve your pictures if you’re paying attention and willing to move.
The private setup also helps. Your guide can respond to what you want, whether your style is more classic and symmetrical or more street-level and atmospheric. You won’t be stuck following someone else’s pace or photo priorities.
Because the tour is in English, you can ask questions clearly without translation delays.
Price and value: $66.09 for portraits plus coached shooting
At $66.09 per person, this isn’t just a stroll with a camera. You’re paying for three things that add up quickly in Amsterdam: a guide, structured photo coaching, and included professional portraits.
The value gets better because the tour includes portrait counts that scale with your package:
- 1 portrait with Quick Shot
- 3 with Take Two
- 5 with Slo Mo
Also, the stops are designed without extra admission costs. That helps keep your day’s spending predictable.
One more value point: because it’s a private tour, you’re not paying for a big group format where you get less time. Your guide can spend the moments that matter on corrections and composition choices.
If you already know photography and just want good views, you might feel it’s more structured than you need. But if your goal is to leave with sharper photos and at least a few strong images of yourself, it’s a solid use of time.
What to bring and how to get the best results
You only need a few basics, but you can make the experience smoother with smart choices.
- Comfortable shoes: you’ll be walking through narrow streets and between photo spots
- Your phone (and make sure it’s charged): the coaching is built around mobile shooting
- A willingness to adjust your position: the best angles usually require small moves
If you’re used to photographing in auto mode, this tour will likely get you thinking about light and framing in a more intentional way. That can feel a little different at first, but it’s one of the reasons people get genuinely better pictures right away.
Since no food or drinks are included, plan a snack or drink before or after. Amsterdam days can go fast, and you don’t want to lose your focus from being thirsty or hungry.
Who this Amsterdam photo tour suits best
I think this is a strong fit if:
- you want phone photography tips that you can apply immediately
- you’d like a professional portrait without hiring a separate photographer
- you want to explore classic Amsterdam areas efficiently in a short time
- you like guided practice more than wandering with guesswork
It may be less ideal if:
- you want a long, slow cultural walk with lots of museum or indoor stops
- you hate moving between locations
- you’re only interested in casual sightseeing and don’t want photo coaching
It’s a practical middle ground: sightseeing that actively improves your results.
Should you book? My decision guide
Book this tour if your priority is better photos with minimal hassle. You’ll get three distinct Amsterdam shooting environments in one tight loop, and the added portrait session means you end with images you can actually use on your next travel post.
Skip it if you mainly want to browse shops, take your time at cafés, and treat photography as background noise. This is a shooting-focused experience, so you’ll get more value if you show up ready to experiment.
If you’re thinking about timing, consider booking early. The tour is commonly reserved well ahead, which is a sign it fits many itineraries.
FAQ
How long is the See Shoot Share photo tour in Amsterdam?
It runs about 1 hour 30 minutes to 2 hours.
How much does the tour cost?
The price is $66.09 per person.
Where do I meet, and where does it end?
You meet at Dam 13, 1012 JS Amsterdam, and the tour ends back at the same meeting point.
Is this a private tour?
Yes. It’s private, so only your group participates.
What language is the tour offered in?
The tour is offered in English.
What’s included in the photo session?
A professional portrait is included, with options for Quick Shot (1 portrait), Take Two (3 portraits), or Slo Mo (5 portraits).
Do I need to pay admission at the stops?
No. Each stop is listed as free for admission.
Is food or drink included?
No food or drinks are included.
Can I cancel for a full refund?
Yes. You can cancel up to 24 hours in advance for a full refund.